This is a fun birthday tradition to start, hanging a birthday banner. Here are some pictures of ones I've made. You could make a gender neutral one to use for all your family's birthdays. Julie wanted one for her son and one for her daughter.
You can even it make it more personalized by making their name as well.
I made these with 5 inch letters. The rectangles are 5 1/2 x 7 inches. The felt behind is 6 x 9 inches, folded to make a casing to thread a rope through. They are made with fabric but can be made with little or no sewing. To figure how much fabric you'll need, this information should help. You will want to use woven cotton or cotton blend fabrics and felt for the back. There is no need to preshrink or pre-wash the fabric because you won't be washing your banner.
- 1/4 yard for the letters
- 1/2 yard wonder under (I've used 805 and 725) this is paper-backed fusible web to fuse the letters on
- 1/4 yard for each print for the background (if the fabric is 45 inches wide, you can get 7 rectangles)
- You'll need 3 or 4 backgrounds
- 1 yard of iron-on pellon interfacing, this goes on the back of the background to keep it from fraying and adds stiffness
- 2/3 yard felt, if the felt is 72 inches wide
- Thread to match the felt if you are sewing, hot glue if not
Other items you'll need:
- Patterns for 5 inch letters (I found my at a teacher's supply store)
- 20 feet thin rope or twine (not yarn it stretches)
- Ruler or/and yard stick
- Sewing pins
- Large safety pin or large bobby pin
Print supply list
These pictures where taken while making a Halloween Banner, the steps would be the same for a Birthday banner. You can make a banner for any occasion. You could make a child's name to hang in their room or your family name to hang in a family room. I suggest you read all the way though the post before you start. Banners are fun to make and anyone can do it!
Step One, The Letters:
Iron the fabric for the letters. It will be easier if there are no wrinkles in the fabric.
Following the directions that come with the
wonder under iron it onto the
back of the fabric for the letters. The paper side up to the iron, the fabric is wrong side to
wonder under.
Trace the letters you'll need onto the
wonder under, the paper side. I use a pencil. Letters need to be
backwards so when you turn them over they'll be right.
Cut the letters out.
Step Two, Back Ground Rectangles:
Iron the fabrics for the background.
Cut the iron-on interfacing into 5 strips. 4 will be 7 1/2 inches wide. 1 will be 6 inches wide.
Following the directions that come with the iron-on interfacing, iron one
of the 7 1/2 inch strips onto the
back of each of the background fabrics.
If you chose 4 backgrounds, you cut 3 rectangles from each strip. If you chose three, cut the 4th 7 1/2 piece of interfacing into thirds. Iron a third onto each of the backgrounds so that you get 4 rectangles from each background. You need one more but wait until after you lay them out.
Cut each strip into 5 ½ x 7
inch rectangles. This can be done using a
rotary cutter and cutting mat.
If you don’t have a rotary cutter you can make a 5 1/2 x7 pattern out of card stock or a file folder. Then trace the pattern onto the interfacing side of the strip and cut out with scissors.
Next lay out your rectangles with the letters on them. Decide the order of the backgrounds.
Now you know which background you need one more of. Cut 8 inches off the 6 inch strip of interfacing, iron it onto the background fabric. Cut one more 5 1/2 x7 inch rectangle.
Peel the paper backing off of a letter.
Position it where you want it on the rectangle. You can eye ball it, or measure it so that the letters are the same distance from the bottom and centered.
Following the directions from the
wonder under press the letter on the rectangle. This is a perfect time to make sure the edges of the background fabric is glued to interfacing by pressing edges. Repeat with all of the letters.
Step three, felt backing:
Cut 13 rectangles 6 x 9 inches. This can be done with a rotary cutter and cutting mat. If you don't have a rotary cutter make a 6 x 9 inches pattern from newspaper. Pin the pattern on the felt and cut around the pattern.
To make the casing for the rope, fold the top down 1 inch and pin.
If you have a sewing machine, stitch 3/4 inch from top. Make sure to back stitch at each end. If you don't like to sew or haven't had much experience don't worry, the stitching doesn't show.
It is
much easier to sew the casing but it can be hot glued. If you use hot glue to glue casing you will have to glue the letter rectangle to the felt in the next step, you can't sew through hot glue. To hot glue use pins to make a line 3/4 inch from top of fold.
Lift the 1/4 inch edge and run hot glue between edge and rectangle, press together (using your fingers, not an iron). Quickly remove pins.
Step Four, Putting it all together:
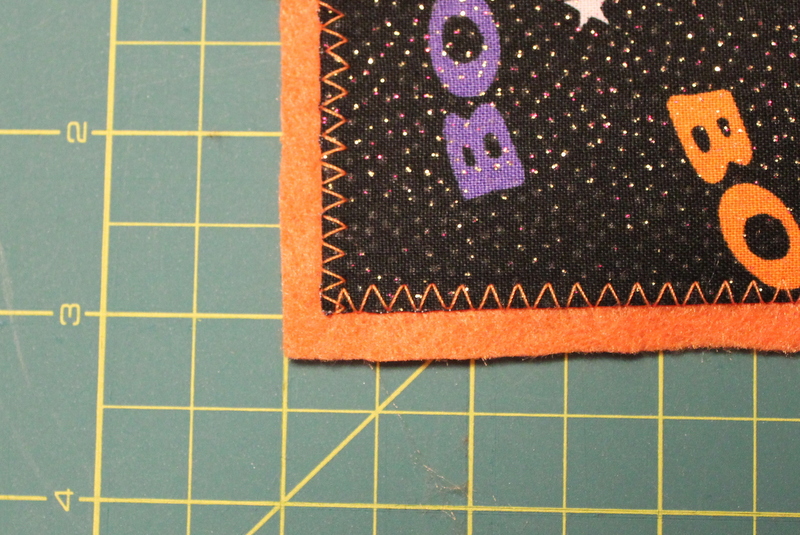
Place a letter rectangle on a felt rectangle, 1/4 inch from the bottom. Pin in place. It will cover the stitching for the casing.
Sew around the letter rectangle using a zig-zag or hem stitch. I use a hem stitch. While sewing, when you get to the corner leave the needle down in the fabric and lift presser foot to turn fabric.
Then let presser foot back down and continue sewing. Repeat with remaining letters.
Or you can hot glue the letter rectangle onto the felt. You might want to use some scraps of the background fabric with the interfacing ironed on to check that the glue doesn't show through.
If it does (and you can't sew) use
Unique Stitch, found at fabric stores.
Before gluing, pin in place by putting one pin in the middle and one near the top in the center.
To glue, lift bottom half and put glue around the edge. Not too close, glue will spread. Press down. When glue is set, remove pins and glue top half.
The last step is to thread the rope through the casings. To do this lay out the letters in order, you can start at either end of a word. Loop the rope though a large safety pin. Use tape to keep the loop in the rope. The pin is so you have something stiff to push though casing.
Leave plenty of rope at the ends. This will make it a lot easier to hang and tie knots. I put each word on it's own rope. If you have a large place to hang the banner you can use one rope. Make knots in the rope to make a space between the words. Be sure to tie the knots before putting the second word on the rope. Now hang your banner. Enjoy!
 Read more...


 Read more...